Wednesday, February 20, 2013

Dappling the model horse - tips and tricks

BEFORE I go into telling you all my trade secrets, I warn you that the process of dappling the model horse is *very* timeconsuming and not for the weak-hearted :D

No, I'm kidding, don't worry. It's not actually that hard once you get the hang of it, but it takes some practise and lots of time to complete a piece.

Anyway, this post is a guide to dappling the model horse. The piece I will be using to show you the dappling process is a nice classic scale 'Arielle' resin sculpted by Carol Gasper. She is a vintage resin from 1994 (I think, not entirely sure about her release date). First off, *many* things went wrong with prepping and painting this piece... Firstly, when I got her, she was 90% prepped - her previous owner had done a great job sanding down seams and filling holes. So all I had to do was sand her over once more and spray her with primer. Here's where the trouble begins: I got my light grey primer and started spraying, but it was finished before I could finish spraying her. In a cabinet in the garage I found another grey spray which I though I could use.
HOWEVER, the spray turned out to be a silver-ish metallic grey - not in the slightest what I wanted! To make it worse, the spray reacted badly with my normal primer, so I had to run and try to wash off the silver primer before the model was completely ruined... It worked (sort of) but it left me with a load of sanding work...
When I finally had her prepped again, I just 'primered' her with a layer of chestnut coloured acrylic paint thinned down with water. Then I put some dark brown/black shading on her and began the graying process.

After that long story, we can now finally get on with dappling the horse :P I create my dapple greys using mixed media in the old-school way.

Before starting:
FIRST THING you have to do when you want to create realistic dapples is to find a good reference picture! Very important! No dapple greys are exactly alike, so make sure that you have good reference pictures of real horses.

Then you will also need a set of *very* thin brushes to paint the dapples with. Depending on the scale you're working in, choose a set of brushes that you think are tiny enough.

The paints you will need are: black, white, brown (depending on wether you're going for a chestnut/bay or black based dapple grey, choose a lighter or darker brown colour). Pearl paints can work well on a dapple grey, but only use them in some areas. I don't use any pearl paints on my pieces as I don't feel comfortable working with them.

To create my dapple greys, I use not only acrylic paints but also some pastels. I only use white, light grey and a dark grey. Black is too heavy and will often leave grainy spots on the model when used over acrylic paint.

Dappling the Dapple Grey:

Step 1: Scrub thin white or light grey acrylic paint in the areas where the dappling is dense and where white areas exist. This is usually on the flanks, belly, head and part of the legs. On my model, also the neck is quite a light grey colour. Make sure you don't scub the white in the dark areas on the horse! The darkest areas are usually the knees, shoulders, back and butt. You *can*, however, scub a tiny bit of white over the dark areas to make the difference less stark. In the picture below you can see that I did that on the shoulder.

Step 2: Get some pure white paint and start painting dapples on the horse. Keep your reference pictures close! Make sure you paint dapples of different shapes and sizes. Randomize the pattern to keep it realistic.

Random dappling on the neck. Don't worry about the dapples looking unnatural, we will fix that later.

Close up of dappling
 Step 3: Scub a bit of white acrylic paint over the edges of the dapple pattern to blend it in with the white/light grey of the head and neck. Keep the paint THIN to prevent brushstrokes and paint buildups!! You can brush some white pastel over the white paint to help keep the paintjob smooth and nicely blended. At the same time, you can add a little shading to the eyes, nose and ears. I use a very dark grey for the shading on the head. For the shading on the cheeks I used a medium grey.
Dapples blended in and facial shading applied
 Step 4: Prepare the next section of the body for dappling. We will now move onto the shoulders and frontlegs. Scrub a little more white paint just behind the shoulders - this is usually the whitest area on the horse. I also applied another layer of white on the belly to build up a solid white-ish grey colour there. There will be no dapples on the underside of the belly, so a well-done solid white colour is desired there.
Preparing the shoulders for dappling
 Step 5: More dappling. This is just repeating the exact same process over and over... Pay extra attention to the whitest areas where the dapples are really dense: they should be blended properly with the white/grey background for a smooth look. Again, don't forget to scrub a little white paint over the dapples (not over the dark areas!) and then a bit of white pastel.
More dapples
 Remember, keep looking at your reference pictures! Keep checking if the pattern you're painting is realistic. Dapples are VERY RANDOM, so if you find yourself falling for the feared 'symmetrical pattern-trap', take a break.
Dapples, dapples, DAPPLES!
Alright, that's it for now :) I hope these inside views on dappling the model horse were helpful for you. Any questions are gladly anwered.

The next part is coming soon! We will get into facial details, dappling the darkest parts and details on the legs like spider-webbing. Exciting stuff! :D

Friday, February 1, 2013

More projects...

More progress on my current projects:


Firstly, the Chips Arab with the resculpted flipped tail and repositioned neck/head. He is now nearly finished in a nice simple black colour. He has some brown highlights too, but the pictures don't really show it unfortunately...

 Secondly, the lying down foal is getting painted a cute bay tobiano. Still a long way to go.
 The other Chips Arab is in the dappling process, which usually takes me several days on stablemate scale models.
 This little filly is new. She was customized from the G3 stablemate trotting foal. She is now in a nice floating trot. I am painting her a black rabicano with many TINY hairs.

 The standing foal is getting along very well too. He now has a dished face for an Arab look. I also lengthened his neck. Oh and his ears broke off in the process :P So I have to resculpt those too.


Now... The Milton custom. He is getting along quite well after driving me crazy for months! I asked several professional artists and people with knowledge of horse anatomy for their opinions. They told me to move back the left shoulder and move forward the left hindleg.
So, I got my dremel and knifes out and chopped him up once more:

 He looks scary! I never really saw the inside of a Breyer, so this was an interesting experience ;D
I started to rebuild his shoulder and below he is standing on his own with the first layer of Apoxie on.


I hope to work some more on the Milton this weekend, as I finally feel I'm on the right track with this guy :) And I REALLY want him off the workbench to have him look pretty on my shelves :P
 
~Amy

Finally completed!

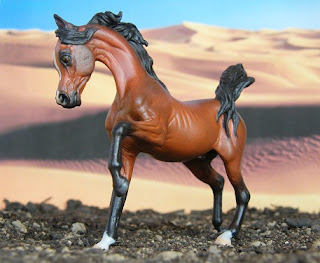
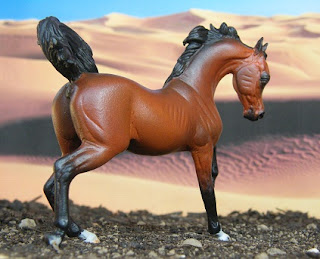
I recently completed my copy of the very rare SA Solar Wind resin by Rebecca Turner. Only 10 - 15 copies exist worldwide, so I am super excited to own one of them!
This little guy I purchased directly from Rebecca a few months ago (he was the very last she still had). He was a casting second with many issues like air bubbles in the resin. His lower right frontleg was missing completely from the knee down too!
But I fixed all that and then painted him to a bright red bay :) Hope you like him!


I have pedigreed him using my models and those of another stable in Australia. His pedigree is 3 generations of model bloodlines on his sire's side! And 2 on his dam tail line. Amazing little guy with some fantastic ancestors. He is listed with all my other Egyptian Arab stallions here: http://silver-moon-breyer.weebly.com/stallions8.html